Dive into a new topic with enthusiasm - applying Rosenshine's principles

Thomas Courtley
Education Specialist

Today we are going to tackle Rosenshine’s Principles of Instruction and how to implement them during the various phases of a lesson. We propose three learning techniques to support you in the application of Rosenshine's Principles while introducing a brand new topic to your class.
Top 3 learning techniques to apply 👉 when you explain a new topic
Which Rosenshine principles are applied in the following three learning techniques?
- Begin a lesson with a short review of previous learning (principle 1)
Rosenshine suggests devoting between five and eight minutes every day, preferably at the start of a lesson, to revise previous learning. Our cognitive load is limited, so if we don’t review previously formed memories, remembering old information can make it harder for us to learn new things.
- Present new material in small steps with student practice (principle 2)
The Cognitive Load Theory explains how our working memory has a limited capacity. If students are presented with too much information at once, the brain suffers from something known as overload. This causes the learning process to slow down, since the brain can no longer process all the information. Introducing learning material in small steps helps prevent a cognitive overload.
- Provide models and worked examples (principle 4)
Delivering new information to students by linking it to something or some process they are familiar with, allows them to gain a quicker understanding of the topic. This is especially true for complex ideas, which need deeper connections to be understood and remembered.
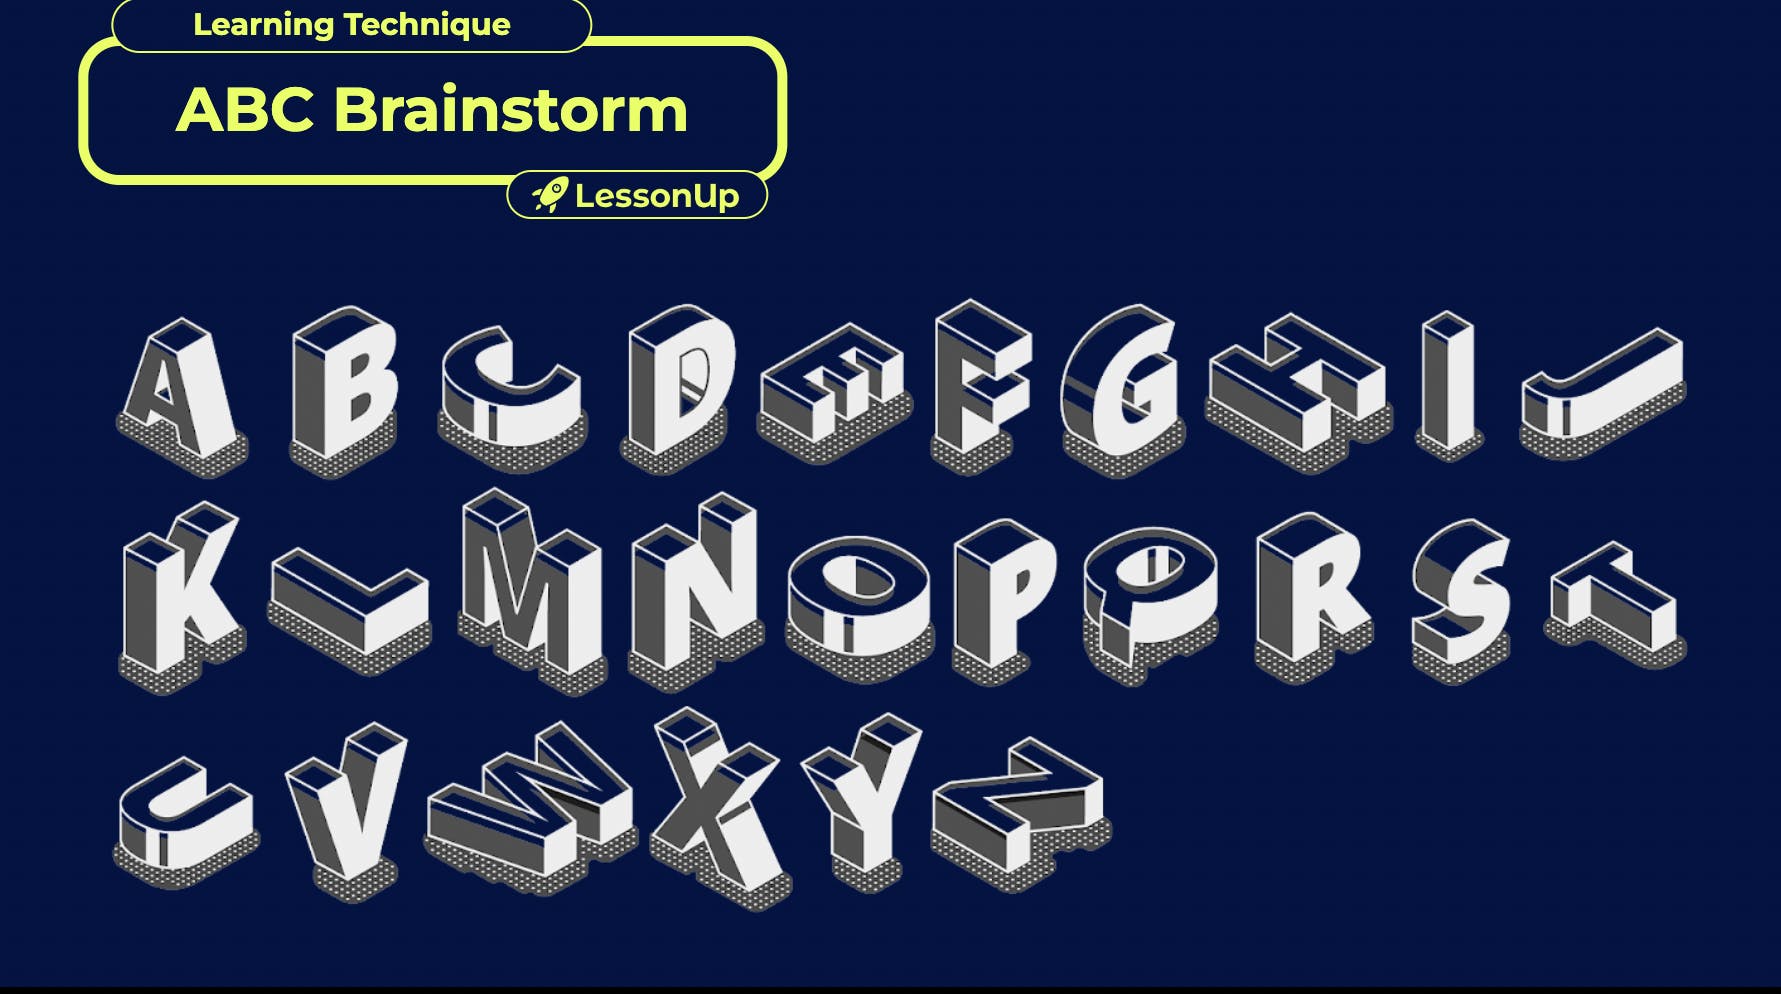
1. ABC brainstorm
To implement the learning technique ABC brainstorm, we suggest you group your students in teams of two or three. Inform your students about the new topic or subject, without further explanation, and ask them to write down a word or short phrase concerning the topic: one for each letter of the alphabet. Together, they are challenged to help each other and come up with words and/or sentences for as many letters as possible.
This learning technique can be implemented on paper, or on the interactive whiteboard. If you choose to send a standard layout to your students, you can ask them to use their own devices to work on it.
Brainstorm together, on a central screen
If you use LessonUp you can create a slide with an open question. In the textual window you could write something like 'Indicate what you know about..', followed by the subject. Students could answer with a list of what they know about a topic, divided by commas or semicolons, starting with the letter A and ending with the Z.
If you want to make it easier for your students by not requiring them to come up with words from A to Z, try breaking it down into blocks of three letters. This way, students have multiple letters to choose from. There are various layouts you can send to your students or upload to LessonUp.
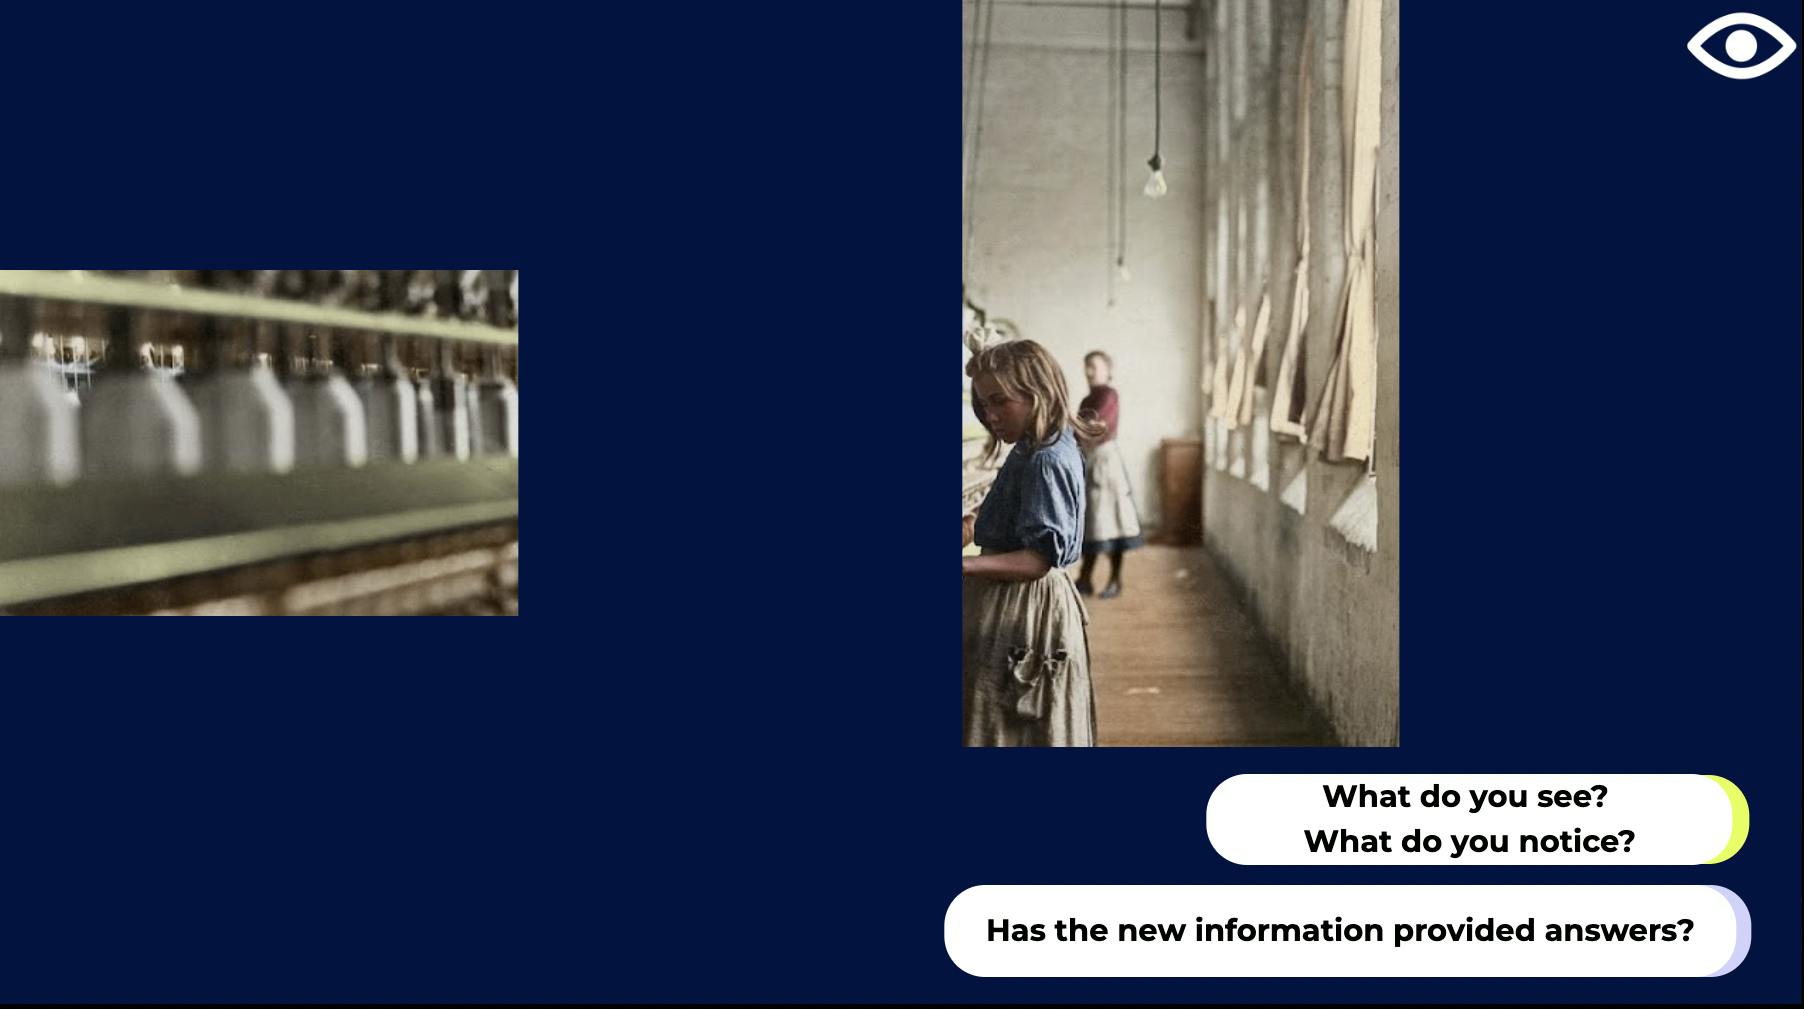
2. Zoom In
With the learning technique 'Zoom In' students get to focus on details, and on drawing conclusions. Each time students are offered small zoom-ins of a bigger picture, one by one, like the pieces of a puzzle. Gradually, they are encouraged to ask relevant questions and draw their own conclusions until the original image is completely revealed.
With this learning technique they experience how 'thinking' is a living process, which changes and matures each time the brain is offered a new piece of information.
To get the most out of this learning technique, you need to select a complex picture containing a lot of detail. The main goal is for students to ask relevant questions and elaborate on the information. Guessing what the initial image is remains secondary.
Each new piece of the puzzle (image) is accompanied by a new question, such as:
- What do you see?
- What stands out?
- Does this new piece of information help complete the picture?
- Do you have more questions?
Zoom In is much more effective with LessonUp slides
Start by choosing the perfect image and embedding it in your lesson. Once you have decided which sections you want to show to your students, in which order, use a black filler (component; symbol) to erase the parts of the image you want to conceal, one by one.
Continue concealing parts of the image with the black filler, slide by slide, until your screen is black, and the original image no longer visible. Remember to start by reversing the slide order, ensuring your students see your last slide first — the black slide — and the complete image as the final slide.
3. Working with hotspots
Many people are good visual learners, and observing a meaningful image is always an interesting experience. A nice picture captures the attention of your students, and can stimulate them to engage in interesting conversations with you and their peers.
This is one of the reasons why classroom walls are often crammed with posters and visual material, fighting to capture students’ attention and ignite their curiosity.
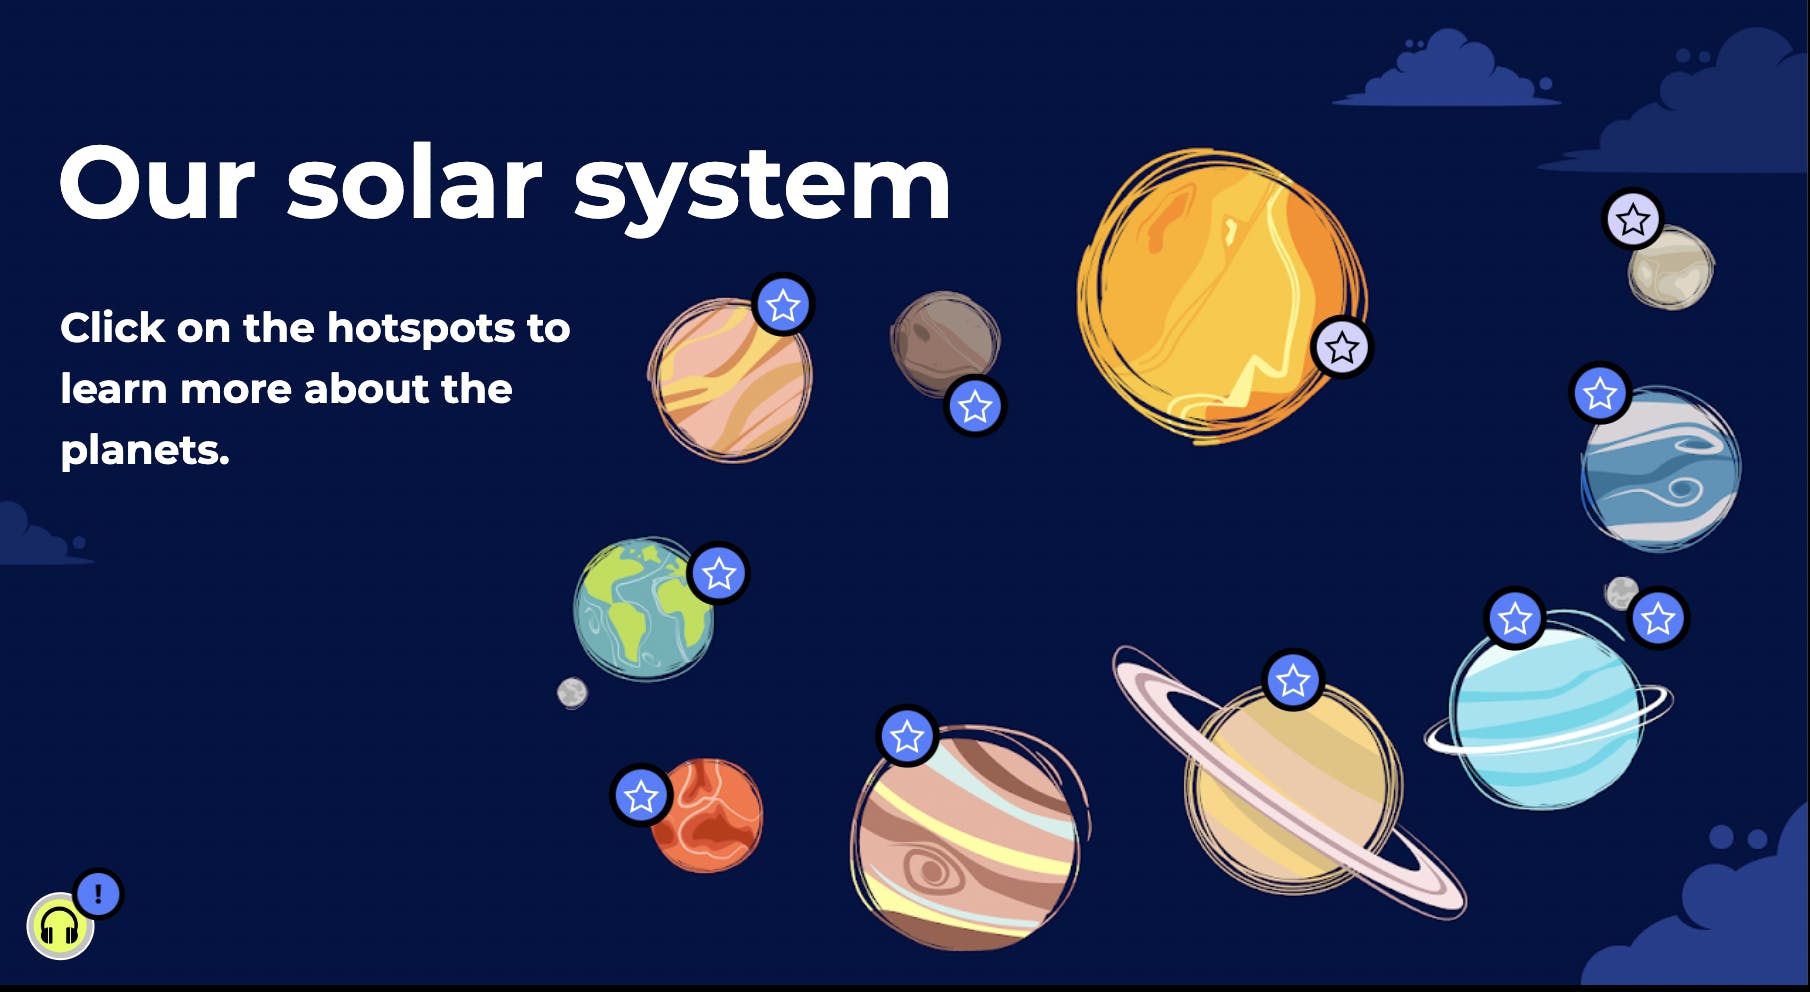
Give images a twist with LessonUp’s digital teaching platform
LessonUp allows you to incorporate hotspots into any selected image. These clickable digital buttons provide students with detailed information about the content displayed in the image. You can enrich any part or detail of an image with information.
Students can explore the image and access the information within the hotspots at their own pace. By using hotspots, you can integrate a wealth of information into an image. Students effortlessly absorb this content as they are curious to explore what lies behind each hotspot.
Want to apply Rosenshine's principles in your classroom? Discover how easy it is to ask questions to your students with LessonUp—Effective ways to assess what your student's know.